Now that you are familiar with the basics of APIs, where can you go to play around and hone your skills? Some switch vendors now release a version of their software that can be run as a VM. Granted the VM version isn’t always super useful for switching, but you can use it as a test bed to refine your API calls. For details on what the virtual Nexus 9000 can and can’t do, see the official documentation here. For those that want to run a virtual 9K on a Mac using VMware Fusion, here is what the official doc linked above has to say:
VMware Fusion is also a powerful virtualization product for enterprise as well as PC user.
Yes, it does exist. The goal of this post is to walk you through how to deploy the VM, configure the VM with a serial port, and connect to that serial port. One thing I would like to point out is the system requirements suggest 8GB of memory (possible to run with 4GB), so depending on how much you physical machine has it can be a bit of a resource hog.
Download and Install
- Download the file from Cisco as an OVA. This does require a Cisco account. Search for “Nexus 9000v” on the software downloads page.
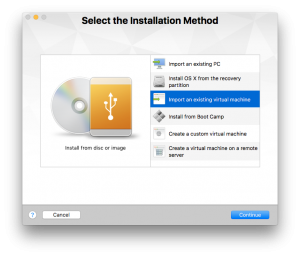
- In Fusion go to File > New and select Import an Existing Virtual Machine, then Continue.
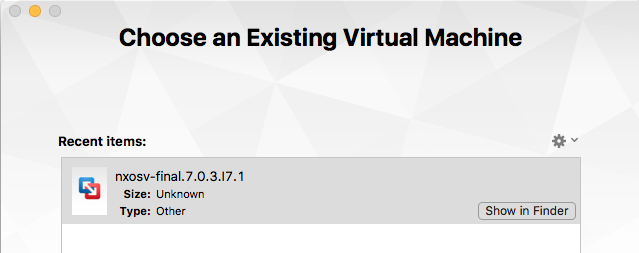
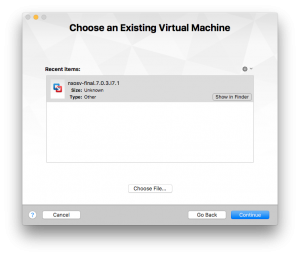
- Select Choose File. . . and select the 9K image you downloaded. Select Continue.
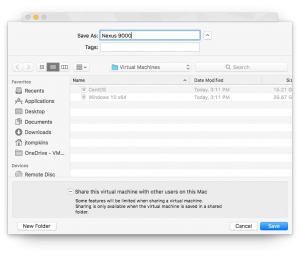
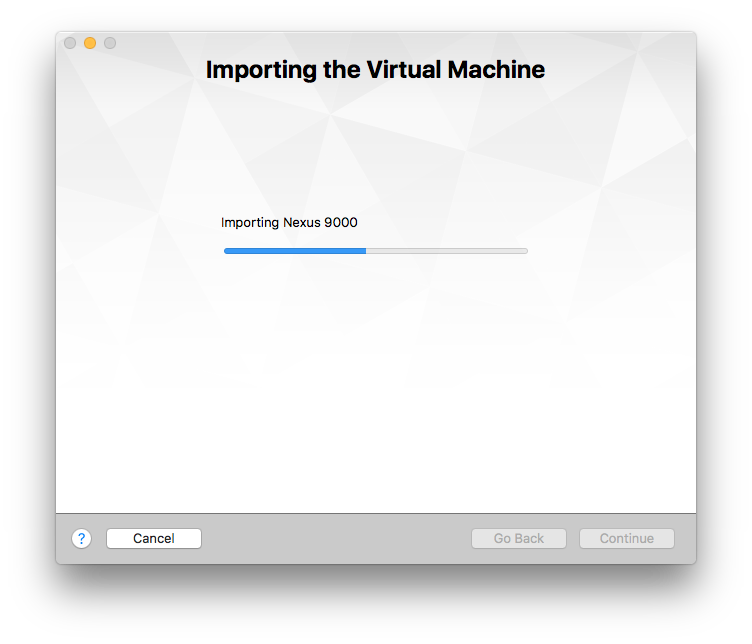
- Select a Directory for the VM files to be stored and hit Save. Fusion will import the OVA.

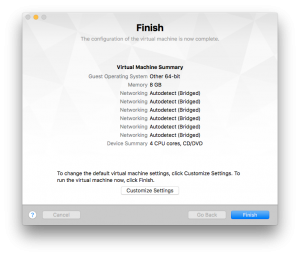
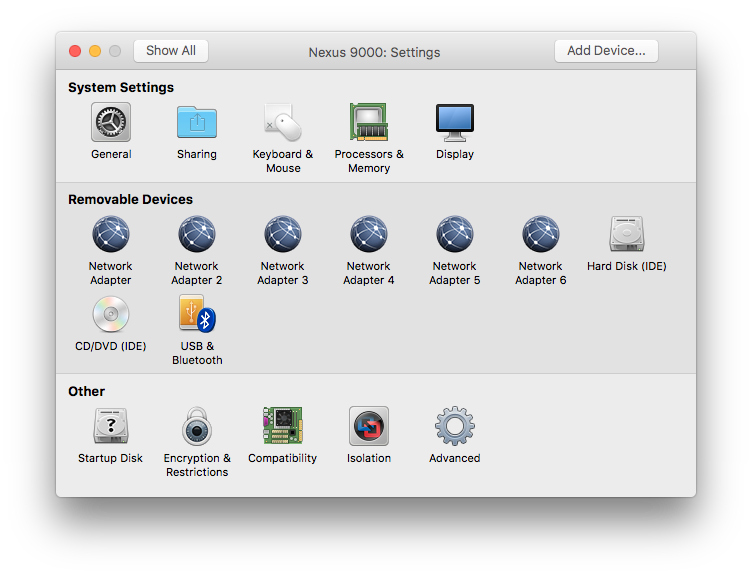
- On the Finish screen, click Customize Settings.
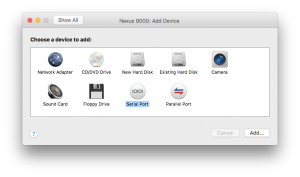
- In the VM settings pane click on Add Device . . .

- Select Serial Port then click Add. . .
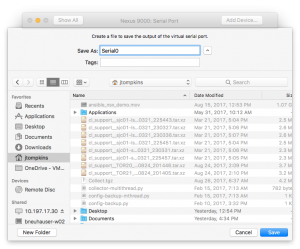
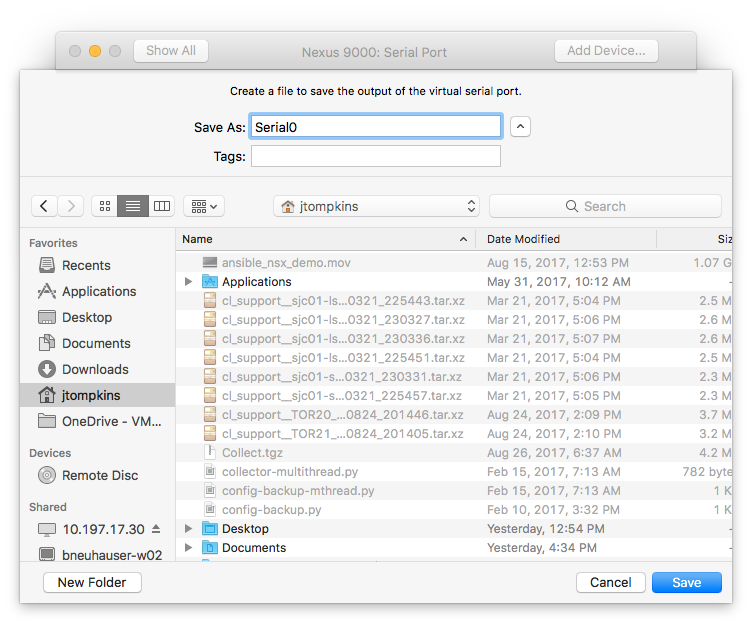
- By default, Fusion writes serial console output to a file. Choose a location for this file (I will show you how to interact with the console in later steps). I chose my home directory to keep things simple.
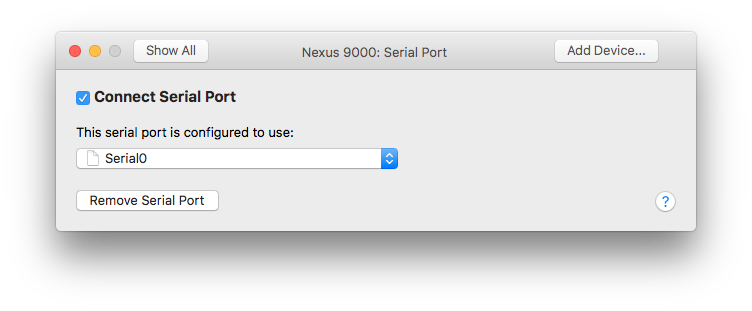
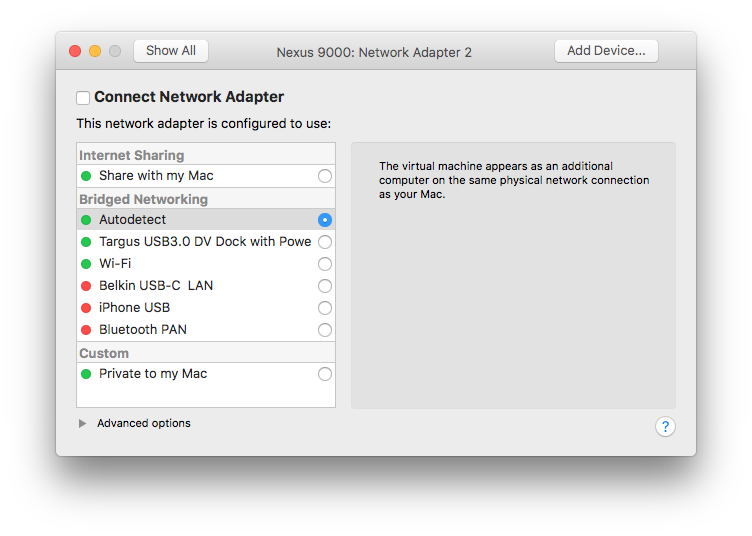
- In the Serial Port configuration, make sure to check the box for Connect Serial Port. click Show All to return to the settings.

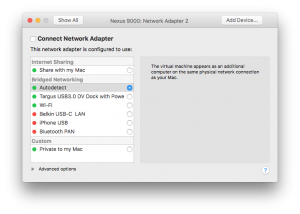
- The device Network Adapter will be mgmt0 interface of the switch. Network Adapter 2 – 6 will correspond to Eth1/1 – Eth1/5 respectively. For now lets disable these interfaces on the VM. If you aren’t an admin user on your Mac, you will have to authenticate 6 times as the VM brings up each interface.
- Click on each adapter and uncheck the Connect Network Adapter box.


Configuring the Serial Console
- Before connecting to the console, we need to change the serial port type from “file” to “pipe” in order to be able to interact with it. To do this you have to edit a setting the VM’s VMX file.
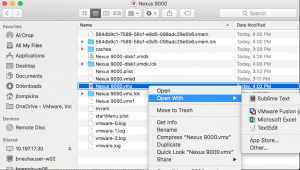
- Navigate to the directory where you saved the VM in step 4 above.
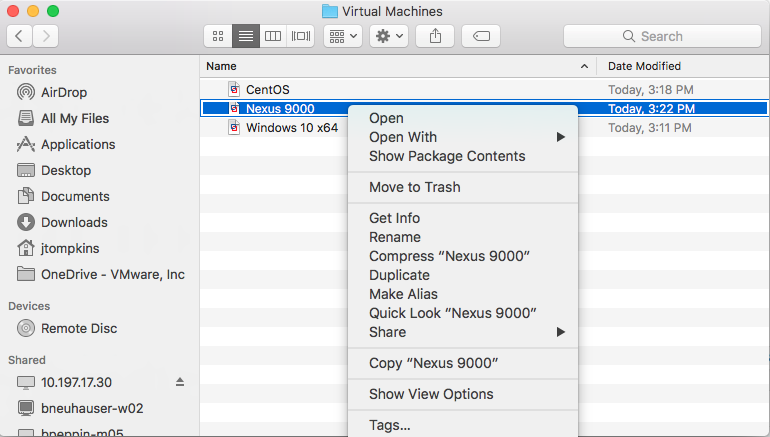
- Right click on the VM and select Show Package Contents. This will open the package containing all of the files backing this particular VM.

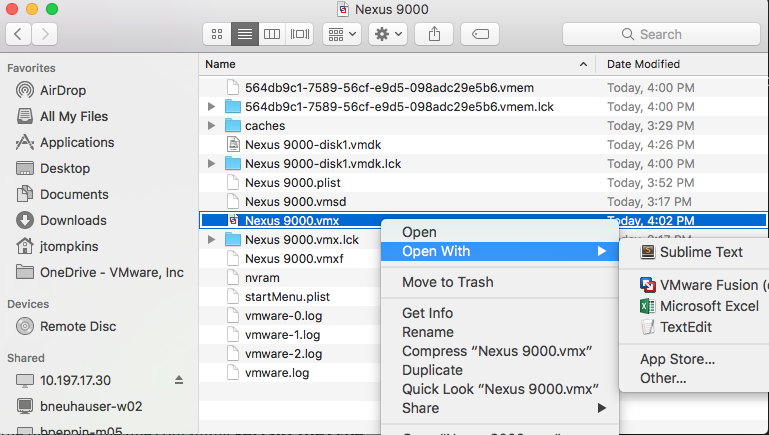
- Locate the file with the .vmx extension, right click on it and choose to open it with the text editor of your choice. I used Sublime Text, since I had bad luck trying to use the built in Text Edit. I think it changed the quotes to smart quotes, and Fusion didn’t like the new characters.
- In the file locate the line containing serial0.fileType = “file”. Edit this line and replace “file” with “pipe” so the end result looks like serial0.fileType = “pipe”.
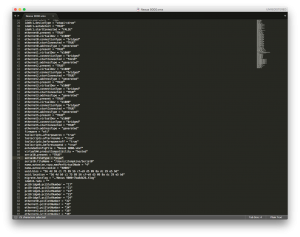
- Save the .vmx file.
- Power on the VM. If Fusion prompts you to Upgrade the VM you can answer Don’t Upgrade.
- On the Fusion console you will see the boot process as it loads the NXOS software.
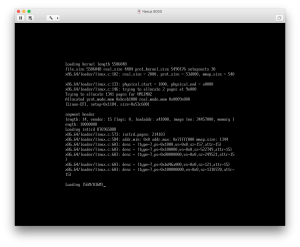
- Once you see the image hash you won’t get any more output from the VM console. At this point you have to connect to the Serial Console to interact with the switch.


Connecting to the Serial Console
For this you will need a command line tool called socat. Socat is like netcat, but you can use it to connect to internal UNIX sockets as opposed to a TCP/IP connection.
- Follow the instructions here on how to install socat – http://macappstore.org/socat/
- Once installed, launch the Terminal application.
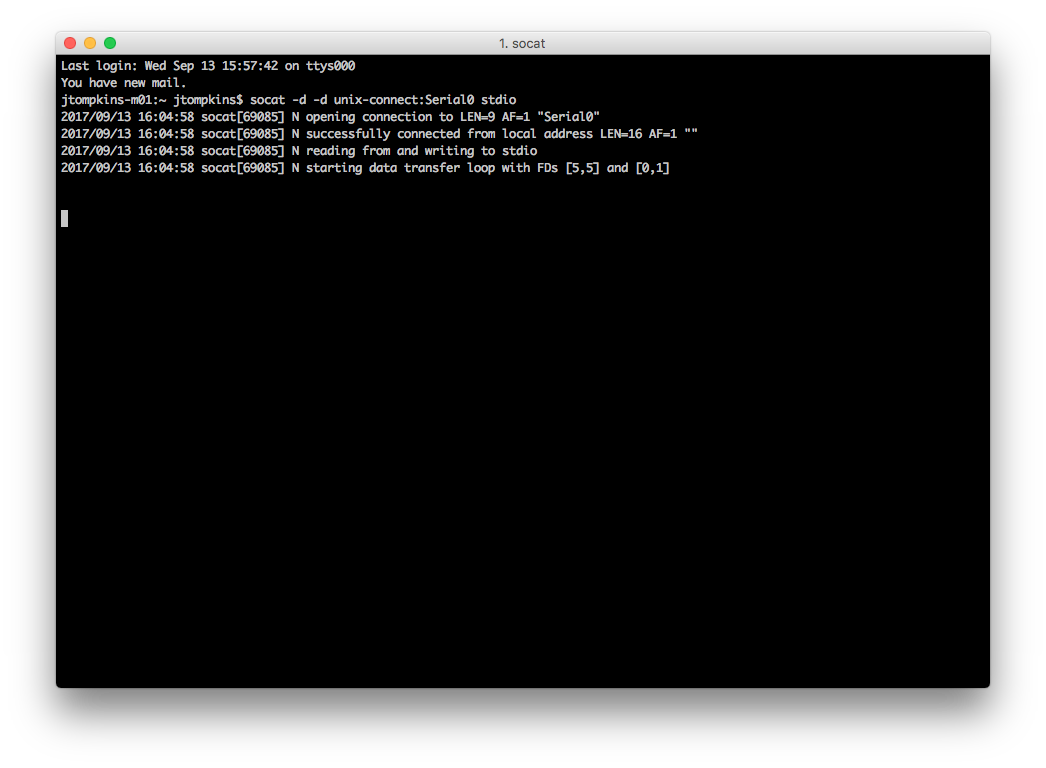
- Use the following command to connect to your serial console: socat -d -d unix-connect:Serial0 stdio.
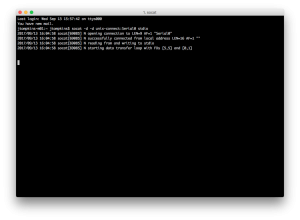
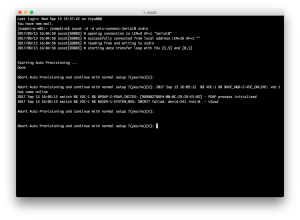
- You should start seeing the typical Cisco POAP prompts as if you were consoled into a new hardware switch.
- There are a couple of restrictions to your new console connection:
- If you use Ctrl + Z to exit config mode, it will end your socat session instead.
- If you run a command like “show run” that pages the command output, the space bar will not automatically advance the output by 1 page. You will need to press the Space bar, then Enter (think of this like typing the word ” “, then hitting enter to send the command.)
- Input text seems to be buffered, then sent across the pipe. As a result, your passwords will appear in clear text in your console session.
- Tab completion does not work.

Configure Your 9000v
Before you exit your first console session I recommend putting in a couple pieces of config first.
1. Configure an IP address on your mgmt0 interface. The default config of the corresponding network adapter on your VM is to bridge the network connection of your Mac. The IP you provide here can be a static address on the same network as your Mac, or can be configured for DHCP and automatically obtain an IP from your home or office DHCP server.
|
1 2 3 4 5 6 7 8 9 10 11 |
switch# config t config t Enter configuration commands, one per line. End with CNTL/Z. switch(config)# int mgmt0 int mgmt0 switch(config-if)# ip address dhcp ip address dhcp Warning: Disable ip dhcp relay if enabled. switch(config-if)# no shut no shut switch(config-if)# |
2. Configure a boot statement using the normal Nexus command. If you boot your VM a second time without configuring the boot statement it will boot to a bootloader prompt, and you will have to give it the boot command from the Fusion console.
|
1 2 3 4 5 6 7 8 9 10 11 12 13 14 15 16 17 18 19 20 21 22 23 24 25 26 27 28 29 30 31 32 33 |
switch(config-if)# dir dir 4096 Sep 13 15:33:18 2017 .rpmstore/ 4096 Sep 13 15:33:34 2017 .swtam/ 486105 Sep 13 15:39:05 2017 20170913_153438_poap_27042_init.log 655187 Sep 13 15:51:57 2017 20170913_154455_poap_26992_init.log 19439 Sep 13 16:06:21 2017 20170913_160513_poap_27007_init.log 882475008 Aug 31 22:39:33 2017 nxos.7.0.3.I7.1.bin 0 Sep 13 16:07:09 2017 platform-sdk.cmd 4096 Sep 13 15:34:36 2017 scripts/ 4096 Sep 13 15:34:39 2017 virt_strg_pool_bf_vdc_1/ 4096 Sep 13 15:33:45 2017 virtual-instance/ 59 Sep 13 15:33:38 2017 virtual-instance.conf Usage for bootflash:// 1281888256 bytes used 2255331328 bytes free 3537219584 bytes total switch(config-if)# boot nxos nxos.7.0.3.I7.1.bin Performing image verification and compatibility check, please wait.... switch(config)# show boot show boot Current Boot Variables: sup-1 NXOS variable = bootflash:/nxos.7.0.3.I7.1.bin Boot Variables on next reload: sup-1 NXOS variable not set switch(config)# |
Up Next
Once you have this done, you can SSH to your virtual switch just like you normally would with a physical one. In a later post I’ll cover how to configure your switch to enable and get started with using the Nexus API.
Hi John,
Thanks for your post, it is very helpful. One thing I am stuck at is the socat piece to be able to connect to the console of the nexus9000v. The command I have been trying is :
socat unix-connect:/Users/test123/Desktop/Serial0 stdio where the path is the path to the file on my desktop which is mapped in my Serial properties in VMware fusion. The error I am getting is:
2017/09/29 21:28:21 socat[49504] E connect(5, LEN=36 AF=1 “/Users/karimjamali/Desktop/Serial0”, 36): Socket operation on non-socket
Appreciate if you have any input.
Thanks
Thanks, Karim!
In step 4 of Configuring the Serial Console, I mentioned I had bad luck with TextEdit – this was the same error I was getting. For some reason, even if you changed the serial0.fileType setting to be a “pipe” in the .vmx file, Fusion doesn’t seem to have registered the change correctly, and may still be treating it as a file. I would recommend the following:
1. Power off the VM
2. Verify that the .vmx setting is still configured as “pipe”
3. Check the .vmx file for stray syntax like trailing spaces
4. Power on the VM and try connecting to the console again (you will probably get dropped into the switches “loader>” prompt and will need to manually boot the nxos image with the ‘boot ::image_name::’ command)
If that doesn’t help, I would recommend trying a different text editor. That worked in my case. Even though the syntax looked correct in TextEdit, it may have been doing some different text encoding on the back end. As soon as I edited the .vmx file with Sublime Text, the pipe worked correctly and I was able to connect to the console once I powered the VM on again.
Many Thanks John for your prompt response…Actually I tried with sublime text when reading the problem you have faced..I will try again and keep you posted!
Thank You
Hi John,
First of all, thank you for this handy tutorial! I finally know what/why when I run Nexus9Kv in Fusion, I can’t get beyond the image hash:
But, it appears that my socat command is giving me an error that I can’t seem to find in my search:
E exactly 2 addresses required (there are 1); use option “-h” for help
I am not sure what this means. I have followed your instructions 3 times (after deleted, and re-importing) and I always end up with this error. If you have any insight on this, I would love to hear it! Or if you can even point me in the right direction, that would be extremely helpful as well.
Thanks again,
Dave
Great article, thanks!
Regarding console connection: I have found that command needs to be
socat -d -d “value_of_serial0.fileName_parameter_in_vmx_file” stdio