The goal of this post is to help network engineers who are just getting started with APIs understand why APIs are becoming more prevalent, the components of an API call, and how to format an API call.
What exactly is an API, and why do I need it?
The acronym API stands for Application Programming Interface which, in its simplest form, means an API is a way to interact with an application. You may have heard an API referred to as a REST, or RESTful API. A REST API is one you send commands to using a web service, meaning via HTTP or HTTPS calls.
The question for network engineers is why bother with an API when I am already familiar with a CLI? CLI output relies heavily on a human to read and interpret it. Data that doesn’t follow some structure is difficult for an automation tool to read and interpret. An API will typically return data in a structured format. Automation tools can then use the hierarchy and structure in the command response to take some action like displaying a value, or finding a value and storing it as a variable to be used later. Of course, you as a human can still interact with a device through it’s API, with the tradeoff that the output you get back probably won’t be as easy to read as what you see in the CLI. The most common output formats for an API call are XML and JSON.
My network device has an API. How do I use it?
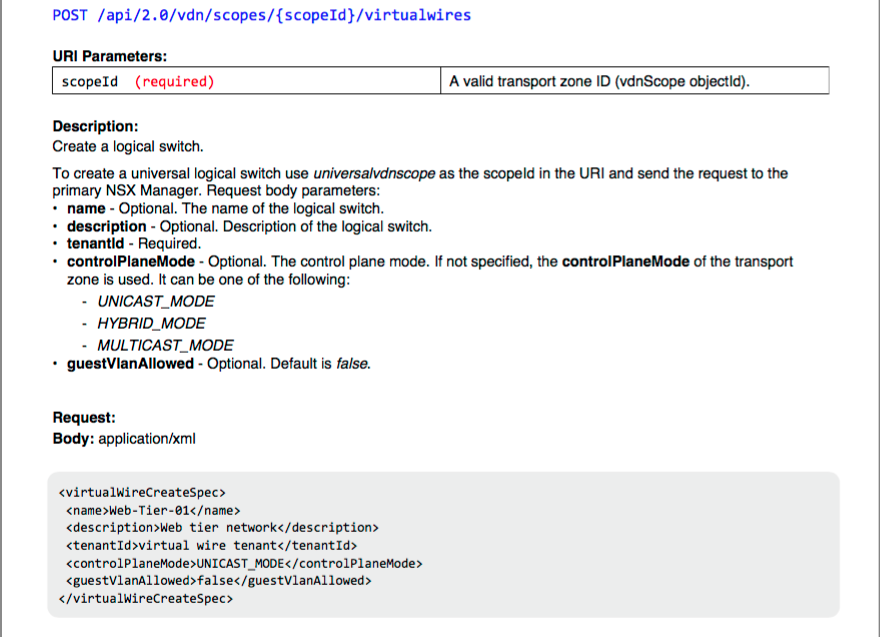
Many network devices and products now come with some sort of API – switches, DDI appliances, and of course SDN products like NSX. The first steps in figuring our how to use your API are – 1) Figure out what you want to do, and 2) Figure out the API call to do it. For step 1, it is best to start with something simple like configuring a switch port description, or creating an NSX logic switch. For step 2, each product vendor typically publishes an API guide that will have information on how to format your API call. I will walk through an example of adding a logical switch to my NSX environment. Below is the documentation for adding a logical switch from the NSX 6.3 API guide.
Anatomy of an API call
Most API calls you will use for network automation are made up of 3 parts:
- URL
- Headers
- Body
URL
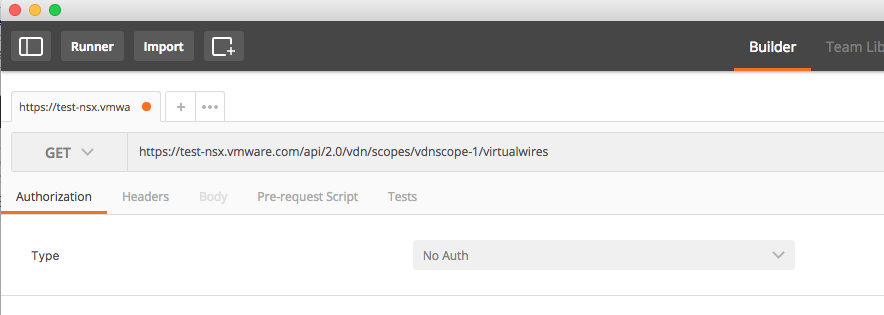
From my NSX API guide above I can see that if I want to configure a logical switch, I need to use the POST method with the URL https://test-nsx.vmware.com/api/2.0/vdn/scopes/{scopeId}/virtualwires. I will also need to replace the variable “{scopeId}” with the object ID of my NSX transport zone. Here is the URL I am using in my REST client:

Headers
REST headers are like metadata for your API call. You won’t need every header for all API calls, but for network devices there are a few common headers you may run across:
- Authorization – describes how you will log into the device you are working with and provides the username and password to do so.
- Content-type – describes the format of the information you will be sending to the device in the body of the API call.
- Accept – describes the format of the data you expect the device to respond with.
For my example API call, I will set an Authorization header for “Basic” with my NSX Manager username and password. I will also set the Content-type header to “application/xml” (I also know this from my API documentation). In the example below, I use the Authorization tab to automatically add my Authorization header for me:

Body
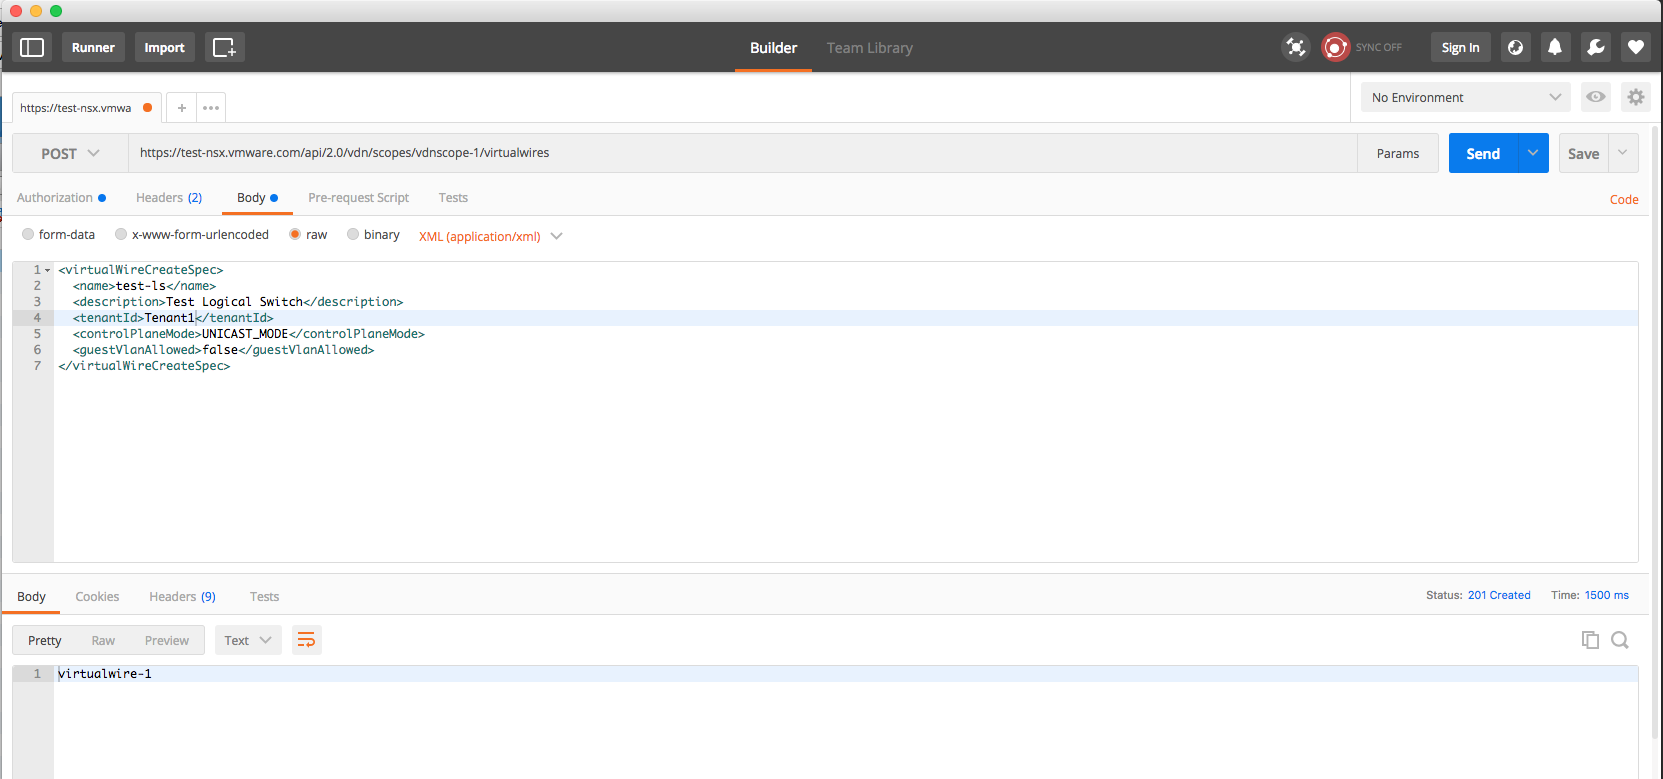
The API documentation also specifies the XML format to include in the body. In this case, the API documentation includes sample values for reference. For this example I am deploying a logical switch named “test-ls” with a “UNICAST_MODE” control plane mode. In my REST client I included raw data in the body, and set the Content-type header by choosing “XML (application/xml)” from the Content-type dropdown. In the example below, you can see the HTTP 201 response code, and the NSX Manager returns the object ID of the newly created logical switch.
Now you can make you own API calls armed with this information. I will cover how automation tools use these APIs to chain multiple tasks together in future posts.
1 Comment